Landing Page
It’s the first page that people will see, the place to communicate what your campaign is all about. Here you can request information from your creators such as their Name, Email, Phone number, etc.
Landing Page is the first page your creators will see. Make it purposeful.
Collecting data from users
You can add custom input fields to your Campaigns, like Name, Age, Email, Phone number, etc.
To add input fields open the Campaign Composer
Navigate to the Input fields section on the right sidebar
Click on the Select dropdown and choose which type of input fields you want to add
After selecting an input field will be added below, where you can change its name, reorder it, and make it required
Added fields will be shown in the live preview
Special Input Types: List and File
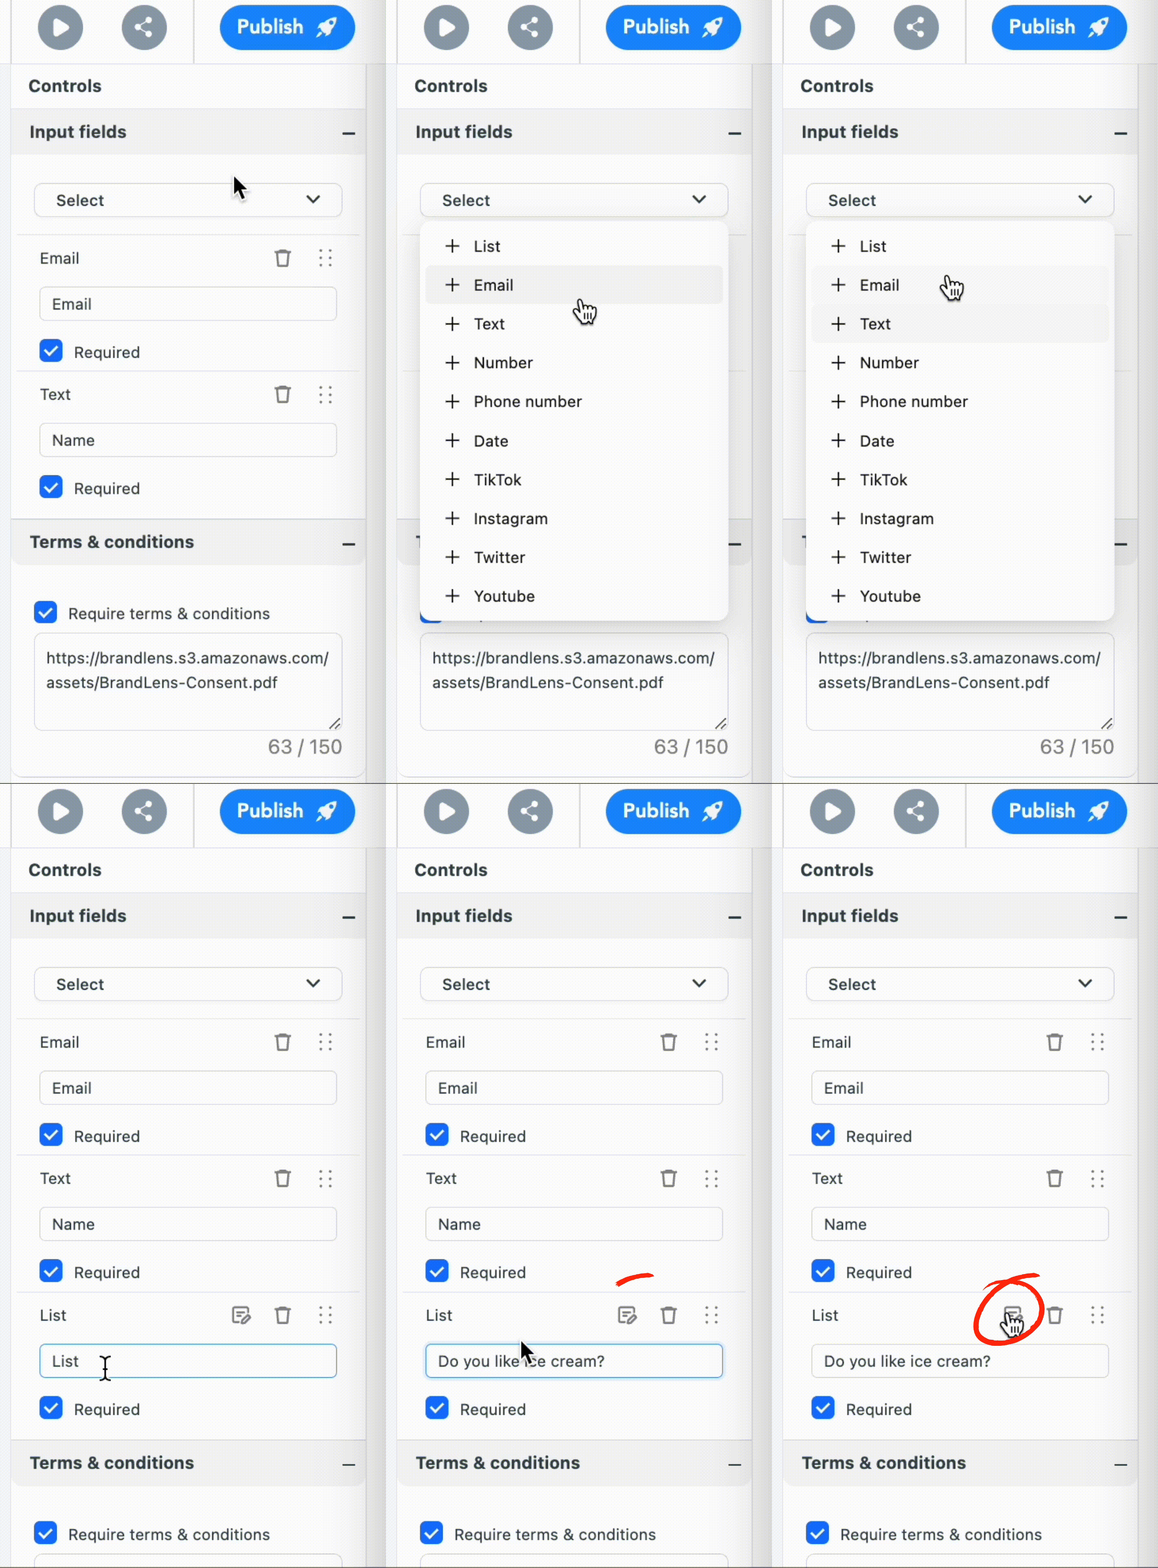
The List allows the creator to choose one possible option from a dropdown menu which can be a question or a statement.
Here’s how you can add a List:
The File allows you to receive various document files or photos from users.
The input accepts files in the following formats:: gif, bmp, jpeg, png, pdf.
To add a File to your Landing Page, follow the same steps for adding any input field, mentioned above.
Camera can display data collected in input fields on the Landing Page. This is done by typing @ in the Text Overlay and selecting the input field name set in the Landing Page. The value entered by the creator will appear as text on the Camera.
Custom Fonts
You are able to download your own Custom (or pre-downloaded) Fonts, to customize the design of your campaign.
The following formats are supported: TTF, OTF
HINT: You can also change the fonts of text on the buttons on the Landing Page and Sharing Page.
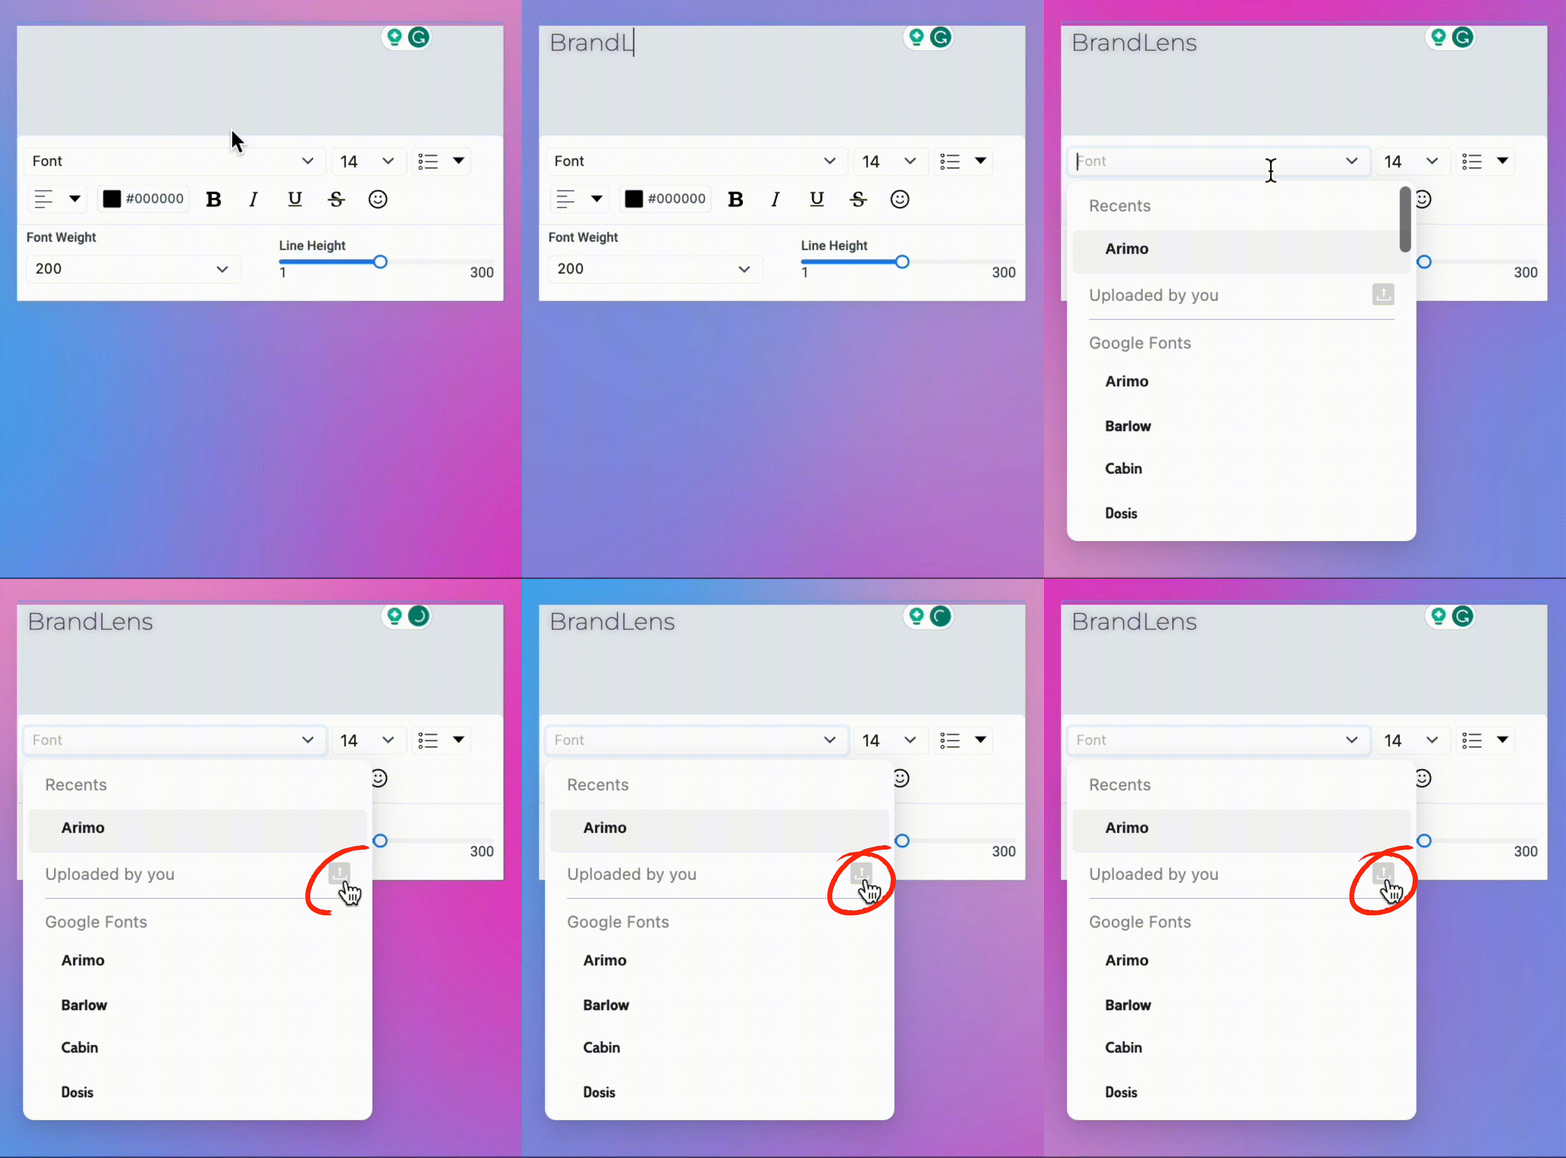
How to add Custom Fonts?
Follow the steps in the video:
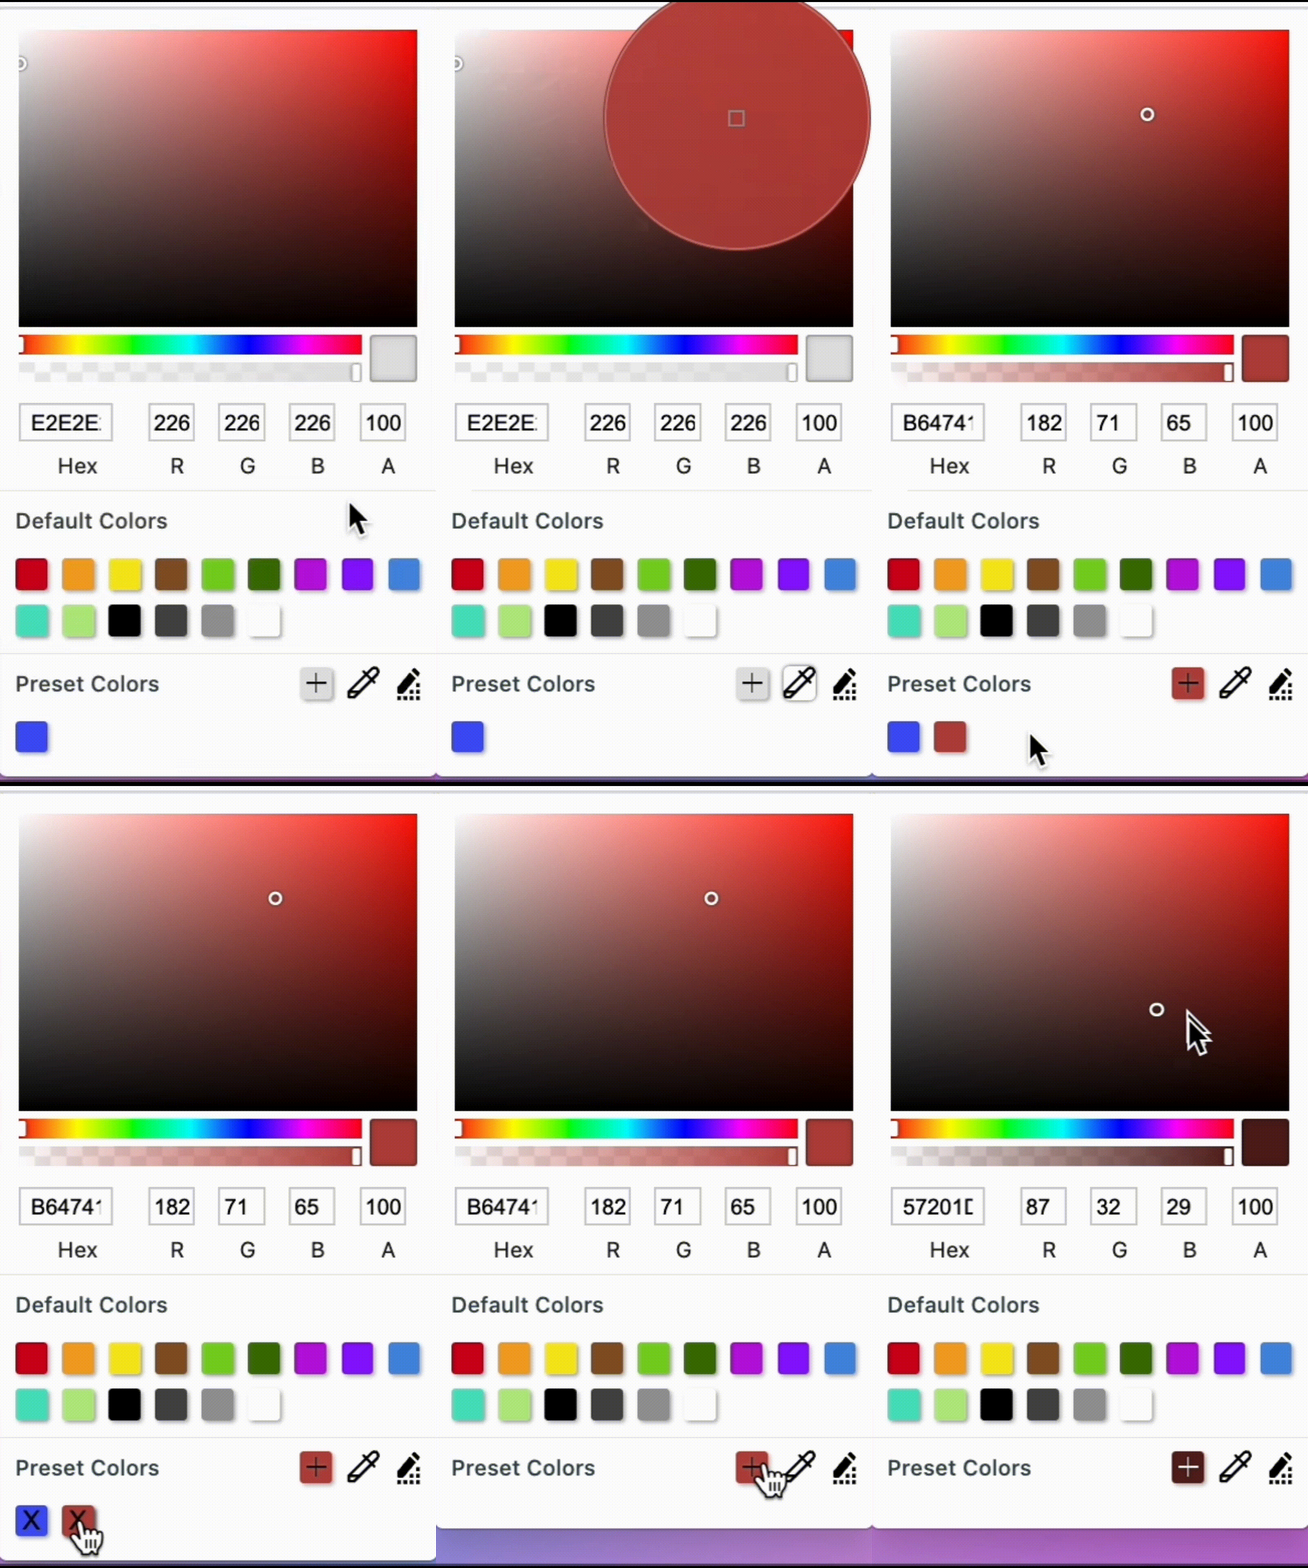
Color Picker
You can use Pipe, to find any new color from your Desktop.
You can Save that color and re-use it on a different page such as Camera Page or Sharing Page.
HINT: To delete the saved colors just click on the ‘edit’ button and choose the colors you don’t need anymore.
Preview Mode (Preview Button) and Production Mode (Publish Button). What’s the difference?
Those are two different modes of your Campaign.
The Preview Mode is for checking how it looks on your device, before publishing. The changes will be displayed without interacting with the Publish button. It’s not for Commercial Use and it will be Watermarked automatically.
.jpg?inst-v=517ee9a5-cffa-473b-b8c1-1a5b3de4be27)
The Production Mode (Publish Button) is the main way to Share the Campaign Link to your Audience. New Changes will not be visible to creators until you press the Publish button.
.jpg?inst-v=517ee9a5-cffa-473b-b8c1-1a5b3de4be27)
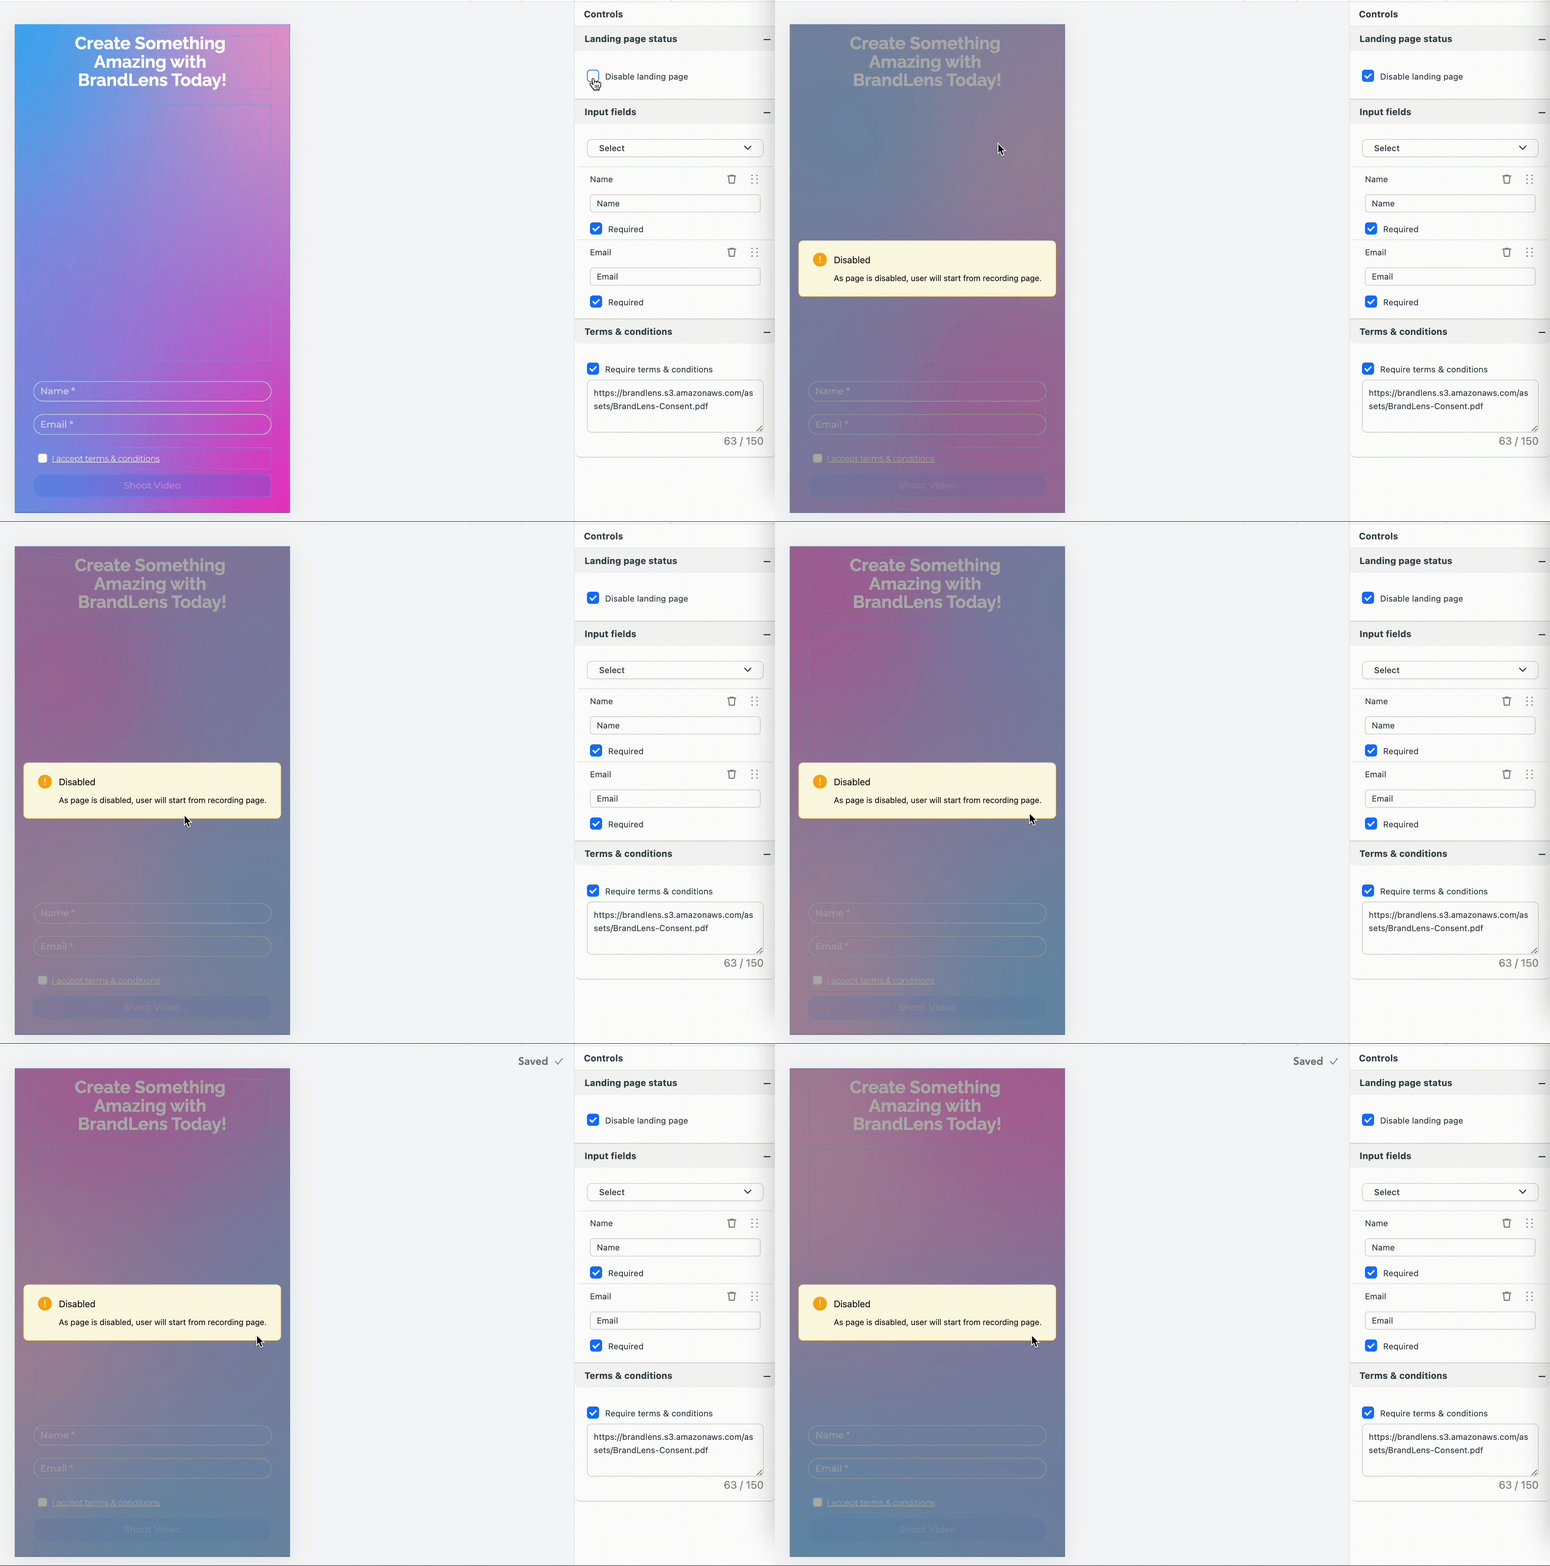
Make Landing Screens Optional
Give creators the flexibility to bypass landing screens and go directly to the camera page.
To do this, follow these steps:
In the control bar, select disable the landing screen, mark the checkbox.
